Reading--Notes
HTML
Images
Choosing Images for Your Site :
If you are building a site from scratch, it is good practice to create a folder for all of the images the site uses.

Adding Images
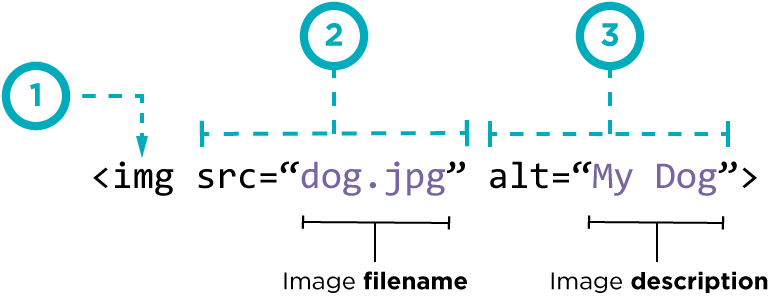
To add an image into the page you need to use an img element. This is an empty element (which means there is no closing tag). It must carry the following two attributes
src : This tells the browser where it can find the image file. This will usually be a relative URL pointing to an image on your own site.
alt This provides a text description of the image which describes the image if you cannot see it.
See the example below
Height & Width of Images :
Height and Width are two other attributes that specify the image size:
-
height This specifies the height of the image in pixels.
-
width This specifies the width of the image in pixels.

Three Rules for Creating Images :
There are three rules to remember when you are creating images for your website which are summarized below. We go into greater detail on each topic over the next nine pages.
-
Save images in the right format : Websites mainly use images in jpeg, gif, or png format. If you choose the wrong image format then your image might not look as sharp as it should and can make the web page slower to load.
-
Save images at the right size :You should save the image at the same width and height it will appear on the website. If the image is smaller than the width or height that you have specified, the image can be distorted and stretched. If the image is larger than the width and height if you have specified, the image will take longer to display on the page.
-
Use the correct resolution : Computer screens are made up of dots known as pixels. Images used on the web are also made up of tiny dots. Resolution refers to the number of dots perinch, and most computer screens only show web pages at 72 pixels per inch. So saving images at a higher resolution results in images that are larger than necessary and take longer to download.
CSS
Color :
The color property allows you to specify the color of text inside an element.
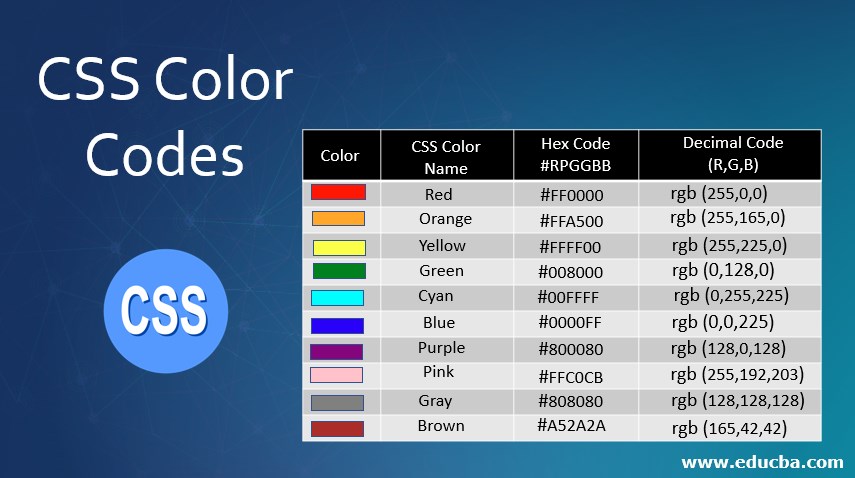
You can specify any color in CSS in one of three ways
-
rgb values : These express colors in terms of how much red, green and blue are used to make it up. example rgb(100,100,90).
-
hex codes :These are six-digit codes that represent the amount of red, green and blue in a color, preceded by a pound or hash # sign. example #ee3e80.
-
color names: There are 147 predefined color names that are recognized by browsers. example: DarkCyan.
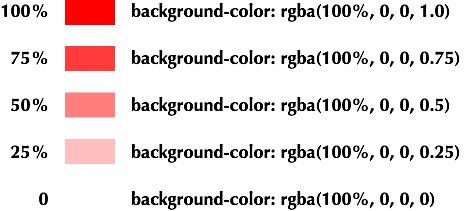
Opacity : opacity, rgba
CSS3 introduces the opacity property which allows you to specify the opacity of an element and any of its child elements. The value is a number between 0.0 and 1.0 (so a value of 0.5 is 50% opacity and 0.15 is 15% opacity).
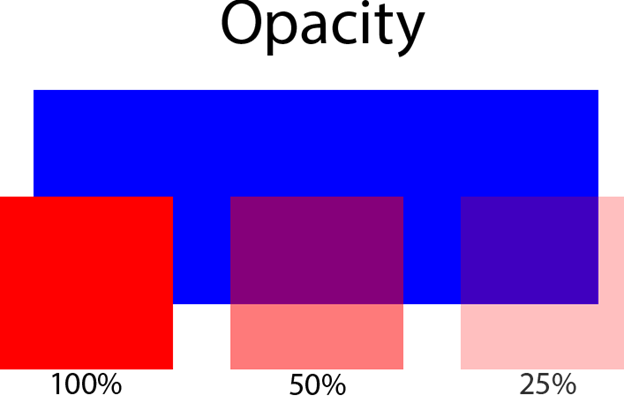
See the decription below
Text :
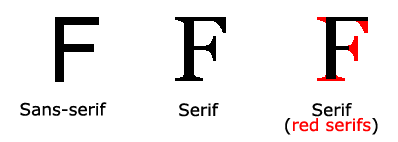
Specifying Typefaces :
- font-family : The font-family property allows you to specify the typeface that should be used for any text inside the element(s) to which a CSS rule applies. The value of this property is the name of the typeface you want to use.

font-size :
The font-size property enables you to specify a size for the font. There are several ways to specify the size of a font. The most common are:
-
pixels: Pixels are commonly used because they allow web designers very precise control over how much space their text takes up. The number of pixels is followed by the letters px.
-
percentages : The default size of text in browsers is 16px. So a size of 75% would be the equivalent of 12px, and 200% would be 32px. If you create a rule to make all text inside the <body> element to be 75% of the default size (to make it 12px), and then specify another rule that indicates the content of an element inside the